Outlook - How do I set my Outlook Calendar to Busy:
About:
This document explains how to change your shared Outlook calendar so that other people can only see your availability (Busy), instead of full appointment details. Instructions are provided for both Windows and Mac.
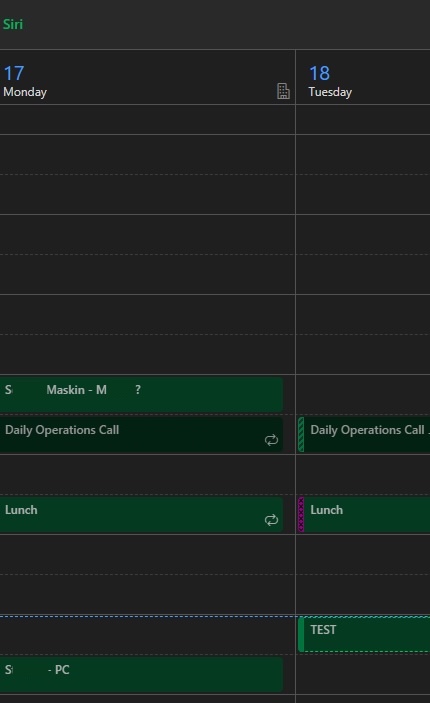
Before:
Windows:
1, Open Outlook and go to Calendar. Locate My calendars.
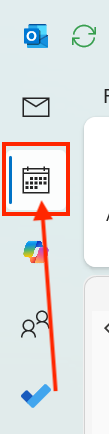
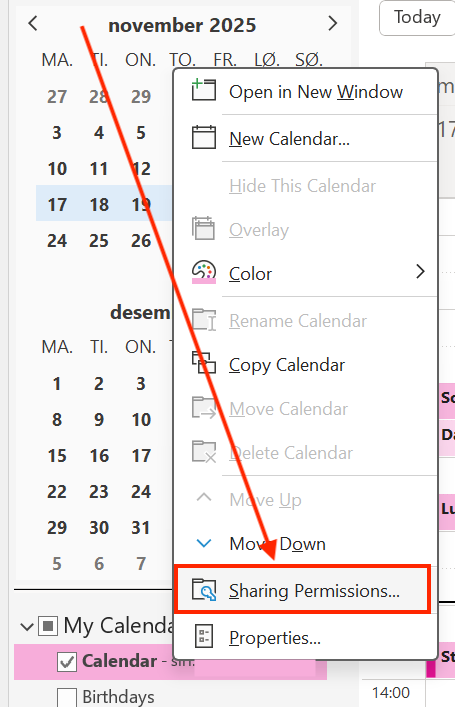
2, Right-click your email address (your main calendar).

4, Select Sharing Permissions.
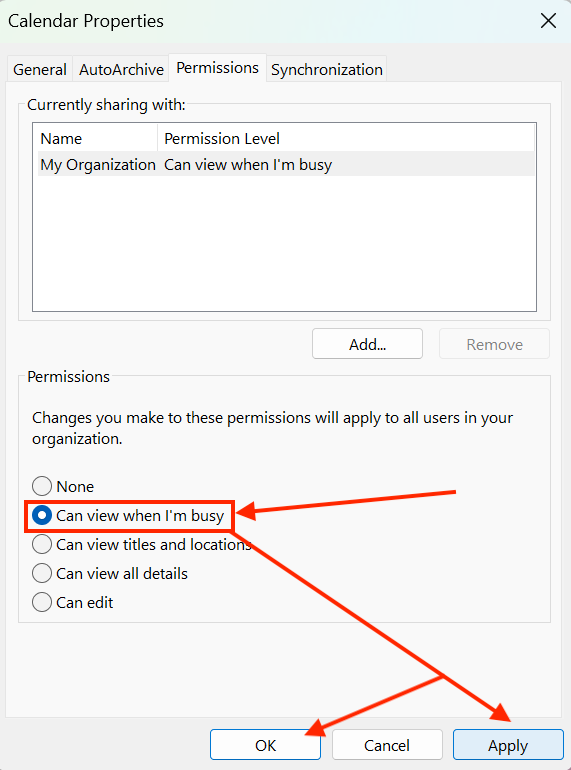
5, Under Permission Level, choose Can view when I’m busy. Select Apply, then OK.
Changes can take up to 12 hours to sync across the system. Please be patient.
MAC:
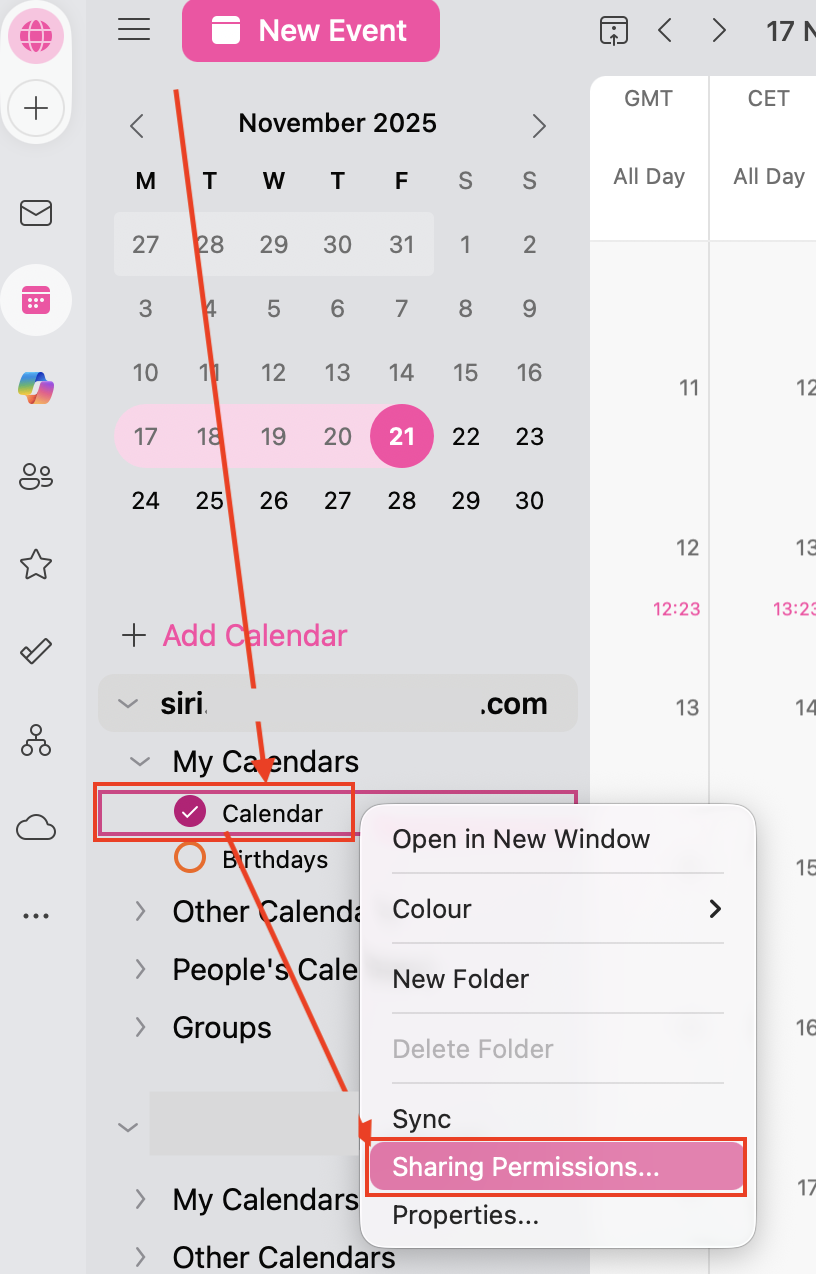
1, Open Outlook and go to Calendar.

2, Locate My calendars. Right-click your email address (your main calendar). Select Sharing Permissions.
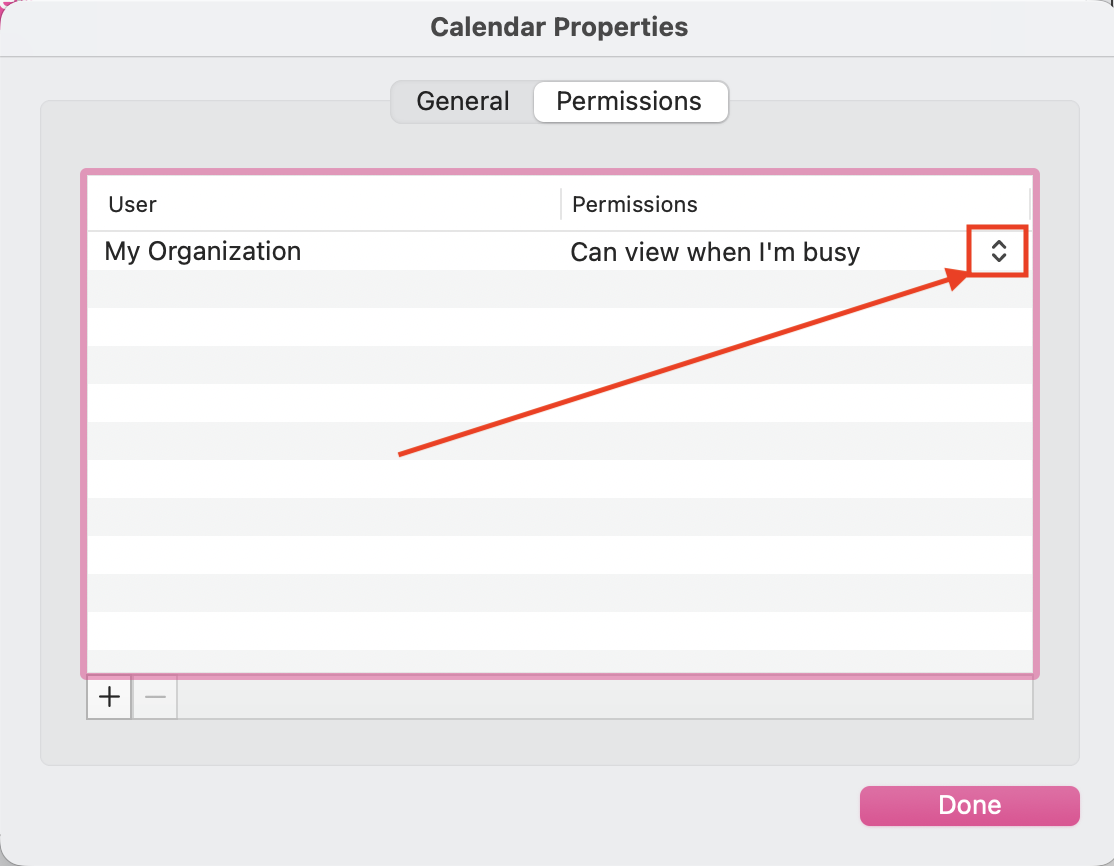
3, Find the permission drop-down menu.
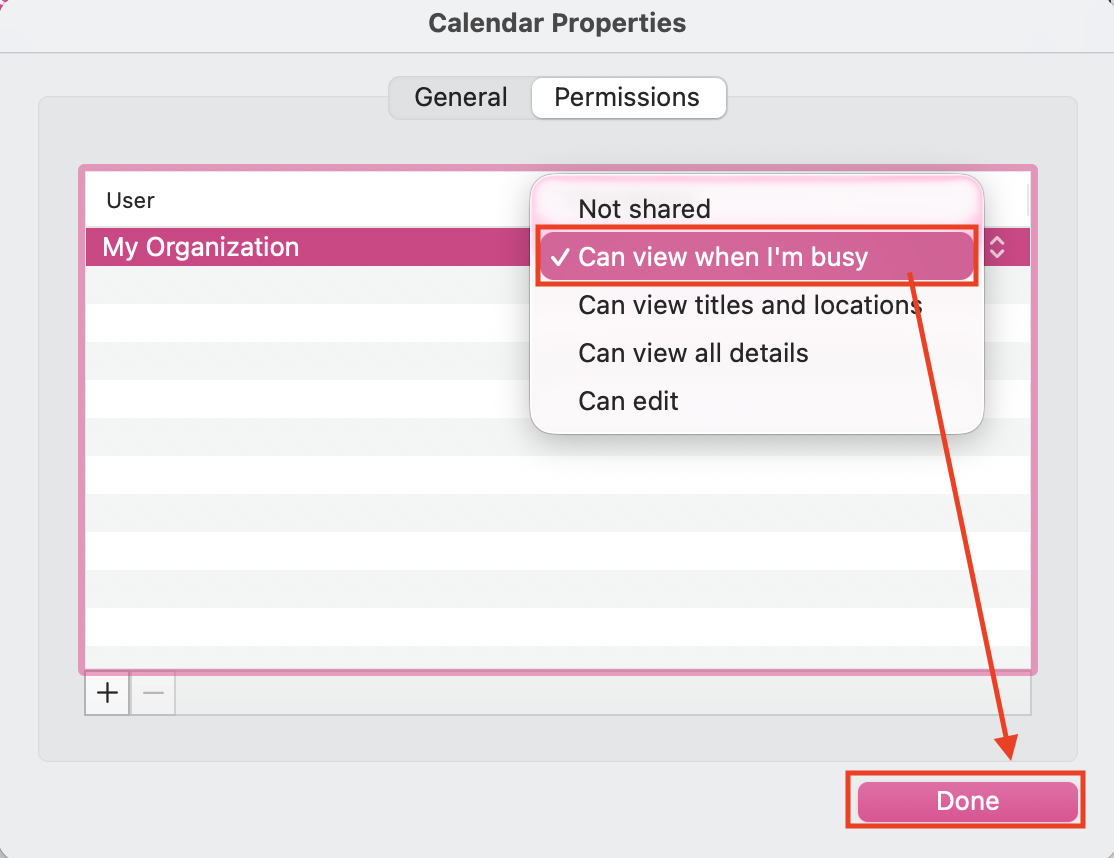
4, Select Can view when I’m busy. Select Done.
Changes can take up to 12 hours to sync across the system. Please be patient.
After:
And you are done 😄